Clients (Leads)
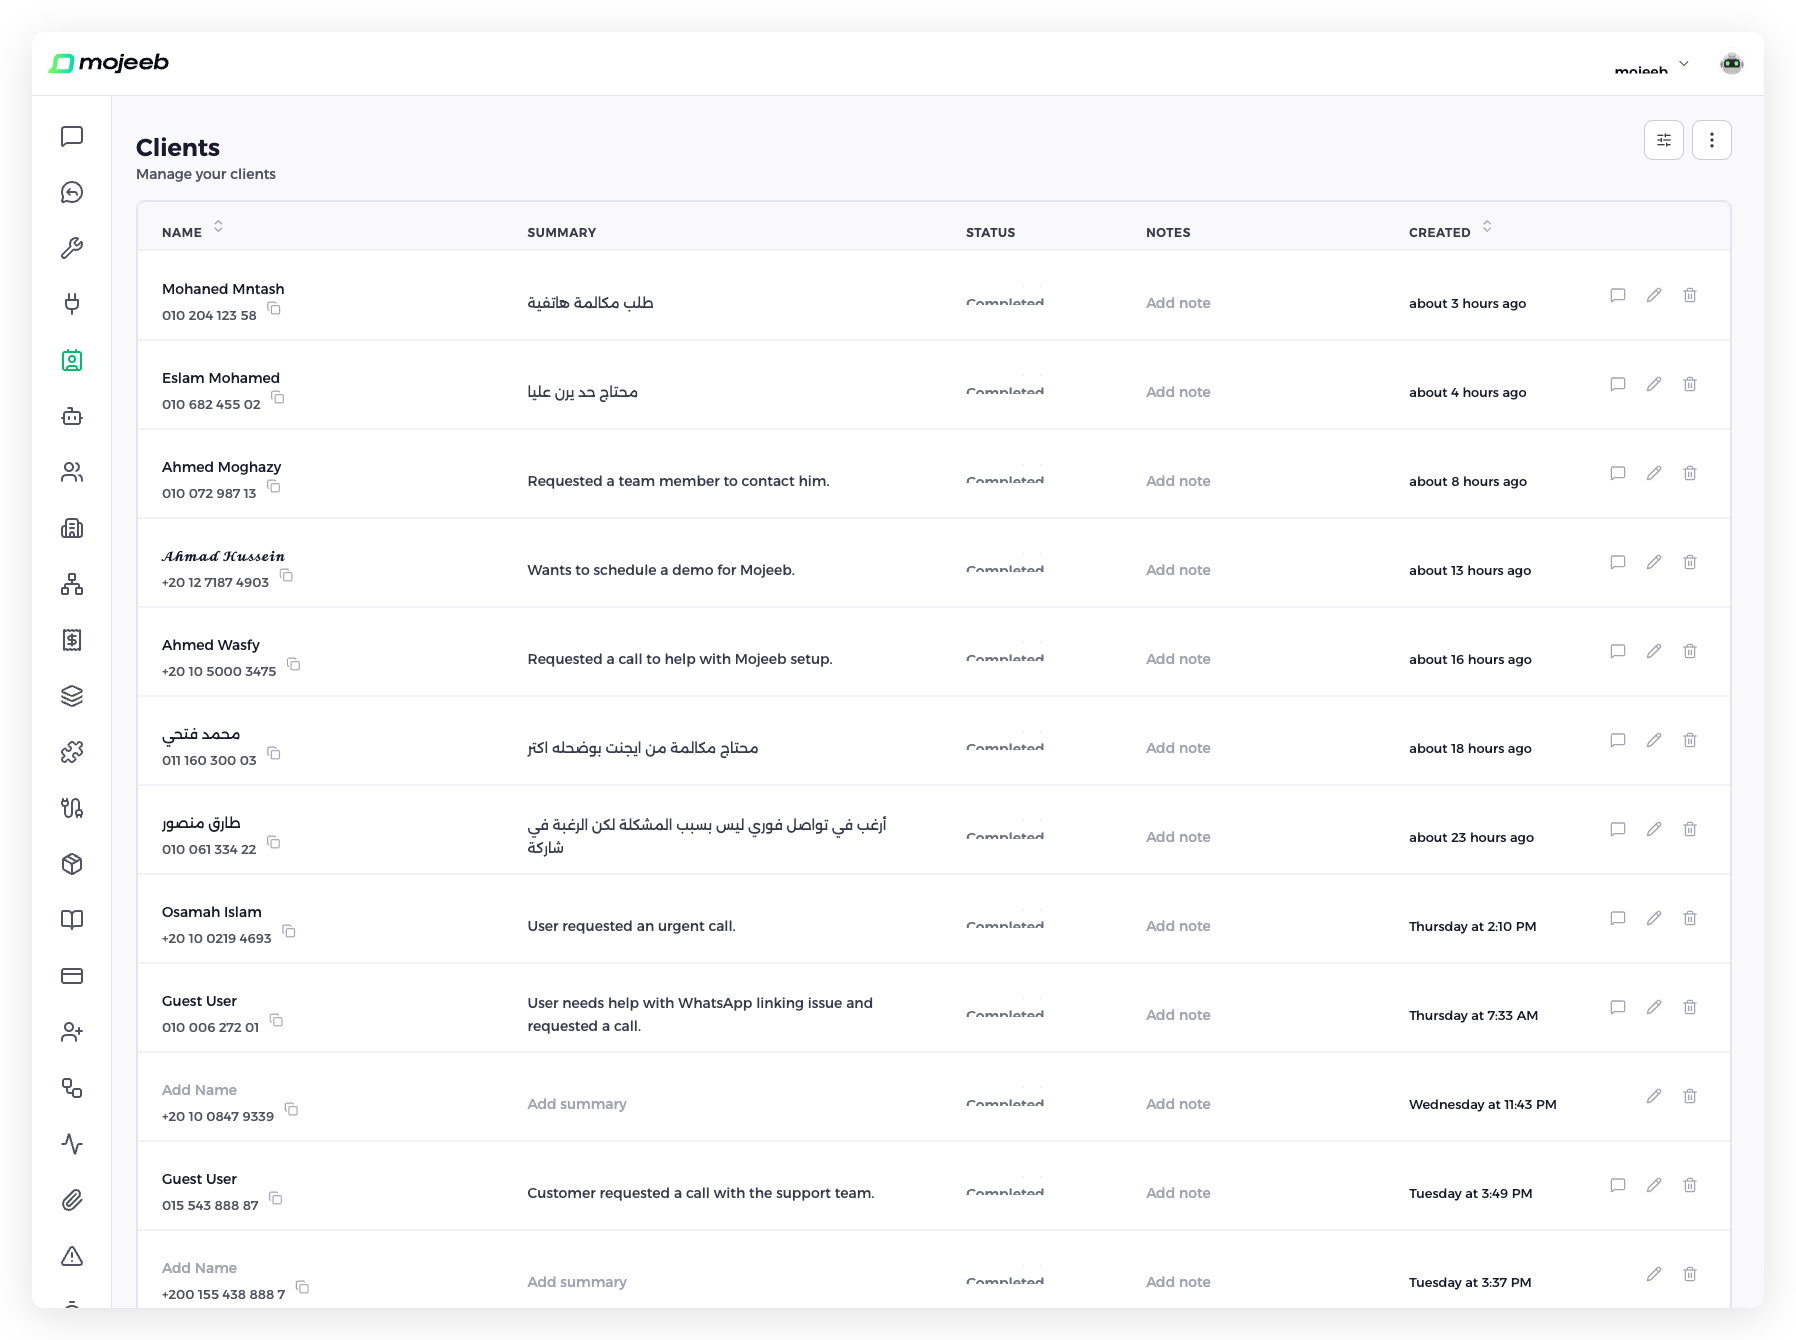
The Clients page is your sales pipeline. Every lead the agent captures from a conversation, and every one your team adds by hand, lands here with a name, phone, summary, status, owner and your own custom fields, plus a link to the conversation and a shared note timeline. It is included on every plan, with no limit on leads.
How does lead capture work?
The built-in Capture Lead tool on every agent saves a customer as a lead the moment the conversation shows contact details or real interest, following an instruction you can edit. The lead arrives with status New, the conversation's owner if it has one, a link back to the chat, and whatever custom fields the agent could fill. A second capture in the same conversation updates the lead instead of duplicating it.
Your team can also capture by hand: Add lead in the chat header saves the current conversation, and Add on the Clients page creates a lead from scratch.
How do I view my leads?
Go to Clients in the sidebar and pick the agent at the top of the dashboard. Leads are listed newest first with their name, phone, summary, status, owner, created date, latest note, and your custom fields as columns. The list opens with Completed leads hidden, shown by an active Status chip; click Clear all to see everything. Mojeeb remembers that choice per agent in your browser.
How do I filter and search leads?
A chip row above the list combines filters, and the list updates as you type or pick. Search matches name, phone and summary. Column headers also carry a funnel icon for a quick filter on that column.
- Search — Name, phone or summary; results update half a second after you stop typing
- Status — One or more statuses
- Owner — All owners, Mine, a specific team member, or No owner
- Creation Date — Today, Yesterday, Last 7 days, Last 30 days, This month, Last month, Pick a day, or Pick a range
- Add filter — Any custom field, for example a city or a product
- Clear all — Removes every filter, including the default that hides Completed leads
How do I view and edit a lead?
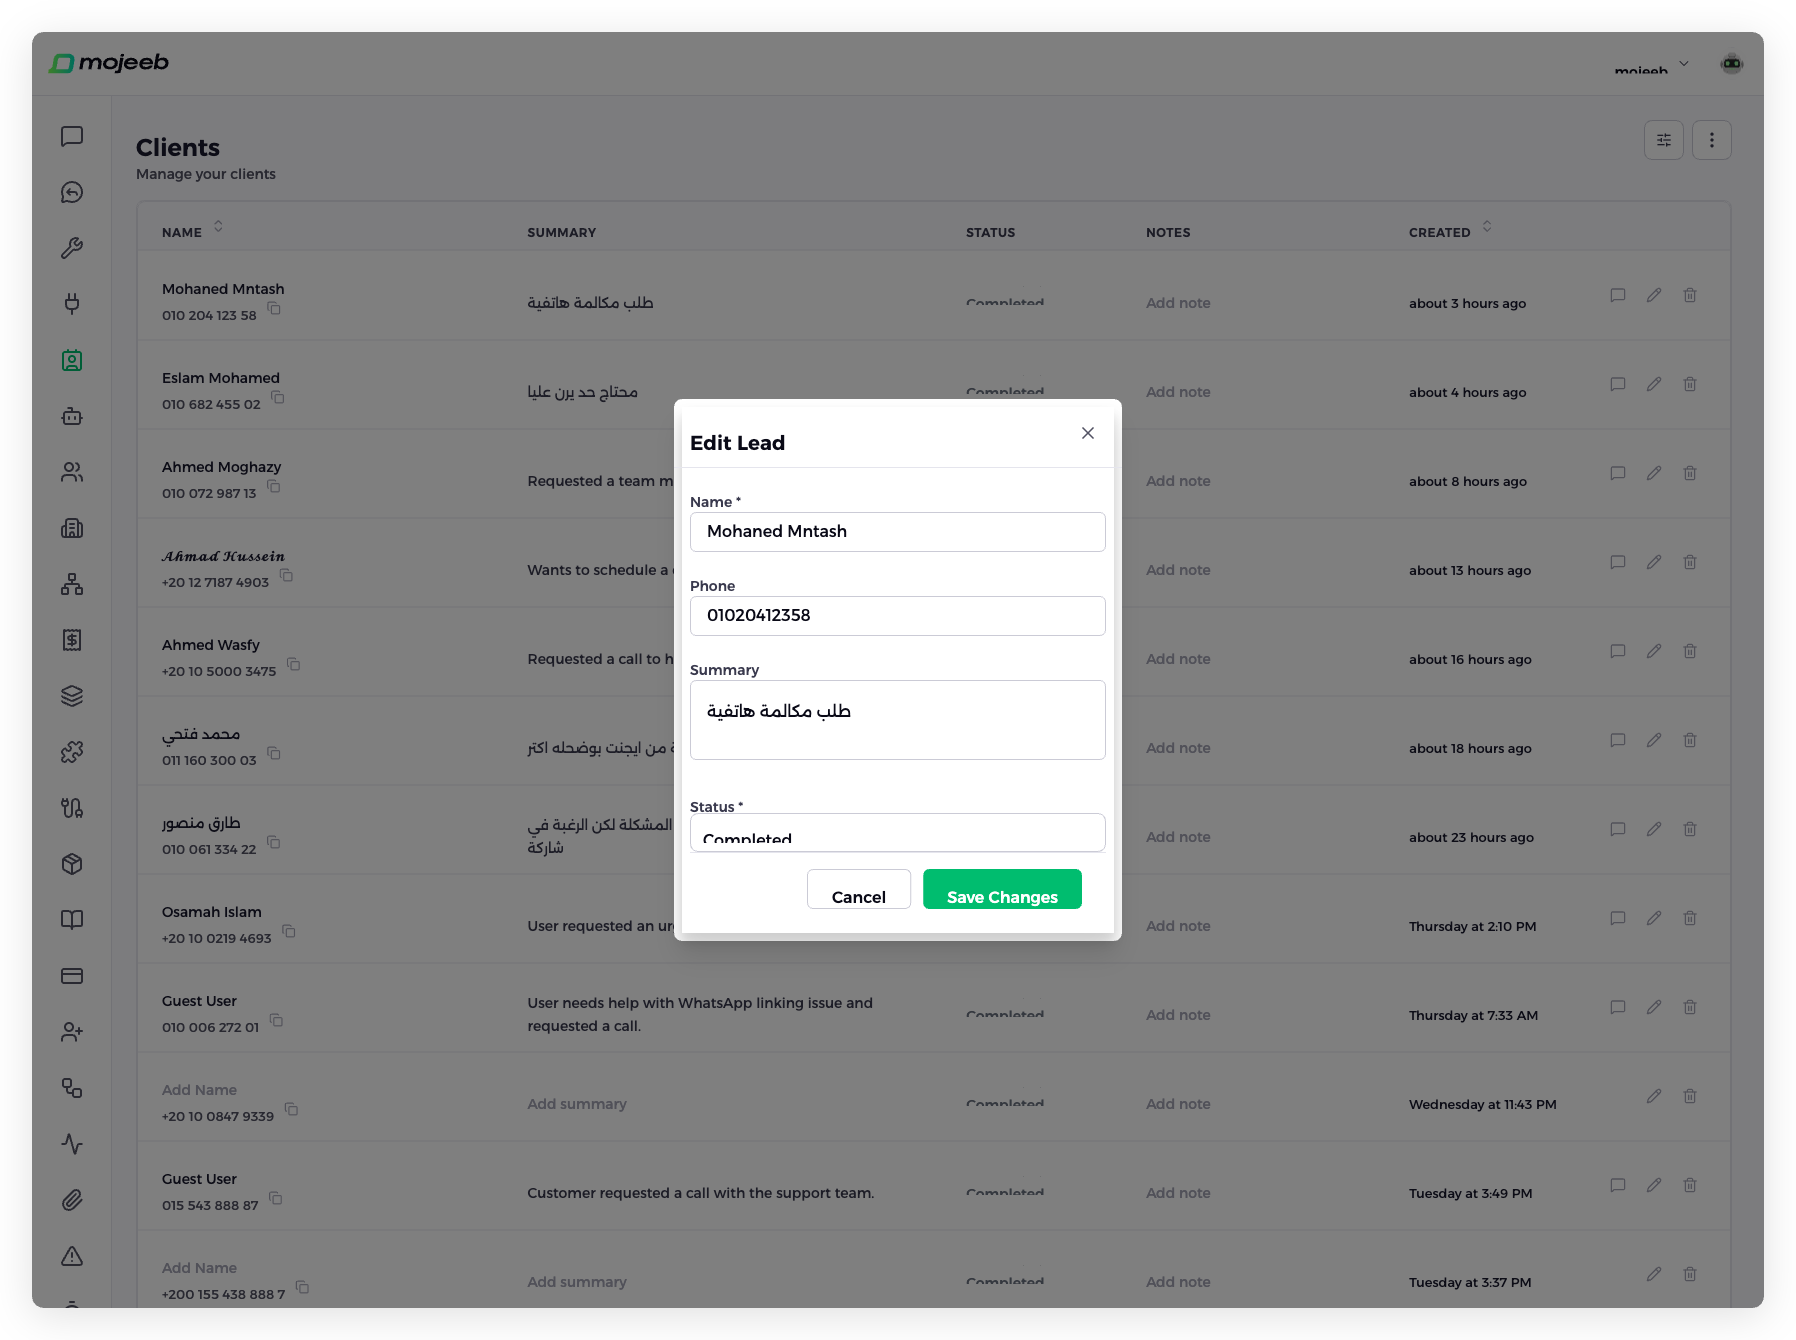
Click a lead's row to open its details. Everything is editable there: name, phone, summary, status, owner, and each custom field. The details also hold the Notes timeline and a Conversation link that opens the chat the lead came from, so you can read the customer's own words before calling.
How do I add a lead manually?
Click Add at the top of the Clients page. The Add Client window asks for the Name, which is required, and optionally the phone, a summary, the status, which defaults to New, the owner, and your custom fields. Click Create Lead. Mojeeb links the new lead to a contact automatically, matched by phone number or created on the spot, so notes work immediately.
How do notes work?
Notes are internal remarks about a customer, written on the customer's contact, so a lead and its contact share one timeline and the same notes appear on the Contacts page. Open Notes from the lead's details, type the note and click Add Note. The timeline shows notes newest first with author and time, marks edited notes, and offers Load older notes.
- Editing and deleting — Only the author can edit or delete their own note; deleting asks for confirmation.
- Status change logs — When a lead's status changes, a system note records the old and new status; these cannot be edited or deleted.
- Old leads without a contact — A few leads captured before contacts existed show "This lead has no linked contact, so it has no note timeline"; a new conversation from the customer links one.
Who owns a lead?
Each lead can have one owner, the team member responsible for following it up. A captured lead inherits the owner of its conversation. The Owner column shows who, or No owner; open the lead and use Add owner to pick a team member, Set me as owner to take it, or Remove owner to clear it. Editing an unowned lead makes you its owner, and the owner is mirrored on the conversation.
Only members who can open the agent can own its leads. Use the Owner filter's Mine option to see your own.
How do I change a lead's status?
Open the lead and pick the status, or change it in the row. Every agent starts with New, Processing and Completed, and each change is logged in the notes timeline. Completed leads disappear from the default view, which keeps the list focused on open work; the Status chip brings them back.
How do I customize lead statuses?
Open the three-dot menu (⋮) on the Clients page and choose Edit Statuses. Add, rename, reorder or remove statuses to match your process, for example New, Contacted, Quoted, Won, Lost. New is required and cannot be removed, and two statuses cannot share a value. Statuses belong to the agent.
How do I add custom fields?
Open the three-dot menu (⋮) and choose Edit Columns, or click the plus icon in the table header. Click Add Column, type the Column name, pick the Column type, and click Create Column. The field key is generated for you and can be changed under Advanced settings before creation only. The agent starts capturing the new field in the next conversation; nothing needs reconnecting.
| Column type | Holds |
|---|---|
| Text (Short) | One line of text, such as a company name |
| Text (Long) | Several lines, such as notes or an address |
| Number | A numeric value |
| Currency | A monetary value |
| An email address | |
| Phone | A phone number |
| URL | A website link |
| Date | A date |
| Date & Time | A date and time |
| Timestamp | A Unix timestamp |
| Yes/No | A checkbox |
| Dropdown | One of the options you define |
Drag fields to reorder them; the order saves when you drop. Edit a field to change its labels, required flag or dropdown options; the key and type are fixed. Delete a field after a confirmation.
How do I edit the AI instructions for lead capture?
Open the three-dot menu (⋮) and choose AI Instructions. The Client Capture Instructions window holds the text that tells the agent when to capture a lead and what to put in the summary. Change it to capture earlier, later or only serious buyers, and save; the next conversation follows the new rule. The same text is editable from the Capture lead card on the Tools page. See Capture Lead for examples.
How do I export leads?
Open the three-dot menu (⋮) and choose Extract. In Export Leads pick Excel (.xlsx), CSV or JSON and click Start Export; a progress window offers the download when the file is ready. Exporting is available to owners and admins; members see a permission notice. The file carries each lead's id, name, phone, status, summary, created and updated dates, and its latest note with author and date.
Before exporting everything, click Clear all on the filter row: an export follows the current filters and only the first selected status, so the default view would export New leads only.
How do leads relate to contacts?
Every lead points to a contact, the person record Mojeeb creates on the first message, and the two share the note timeline. The lead carries the sales side, status, owner, summary and custom fields; the contact carries the person, channels, conversations and notes. One contact can have several leads over time. Open the person from a lead through its conversation, or find them on the Contacts page.
How are leads organized?
Per agent. Each agent has its own leads, statuses and custom fields, so a sales agent and a support agent keep separate pipelines. Switch agents with the selector at the top of the dashboard. Team members limited to specific agents see only those agents' leads; see Team Management.
Common questions
Can I recover a deleted lead?
No. Deleting a lead is permanent, so delete only when a lead was created by mistake; otherwise set its status to Completed or a status of your own, which keeps it out of the default view.
What happens when I delete a lead?
The lead and its status history are removed. The customer's notes stay on their contact, and the conversation is untouched, so a later capture from the same chat creates a fresh lead.
Can several team members add notes to the same lead?
Yes. Every member with access to the agent can add notes, and the timeline shows who wrote each one. Each person can edit or delete only their own notes.
Is there a limit on the number of leads?
No. Mojeeb does not cap leads on any plan. Every lead stays on the Clients page until you delete it.
Can I see which conversation created a lead?
Yes. Open the lead and click Conversation. Leads captured automatically also keep the customer message that triggered the capture.
Do leads update in real time?
Yes. New leads and changes made by teammates appear without refreshing the page.
Related
- Capture Lead — how the agent captures leads and how to tune it
- Contacts — the people behind the leads
- AI Conversations — where leads come from